
When you’re tweaking a Kali LP-6, the dip switches are your first line of control. They determine everything from power mode to output timing. Knowing the optimal settings can save you hours of trial and error and keep your projects running smoothly. In this guide, we’ll dive deep into the kali lp-6 best dip switch settings for 2026, break down each switch’s role, and show you how to configure your unit for maximum performance.
Understanding the Kali LP-6 Dip Switch Layout
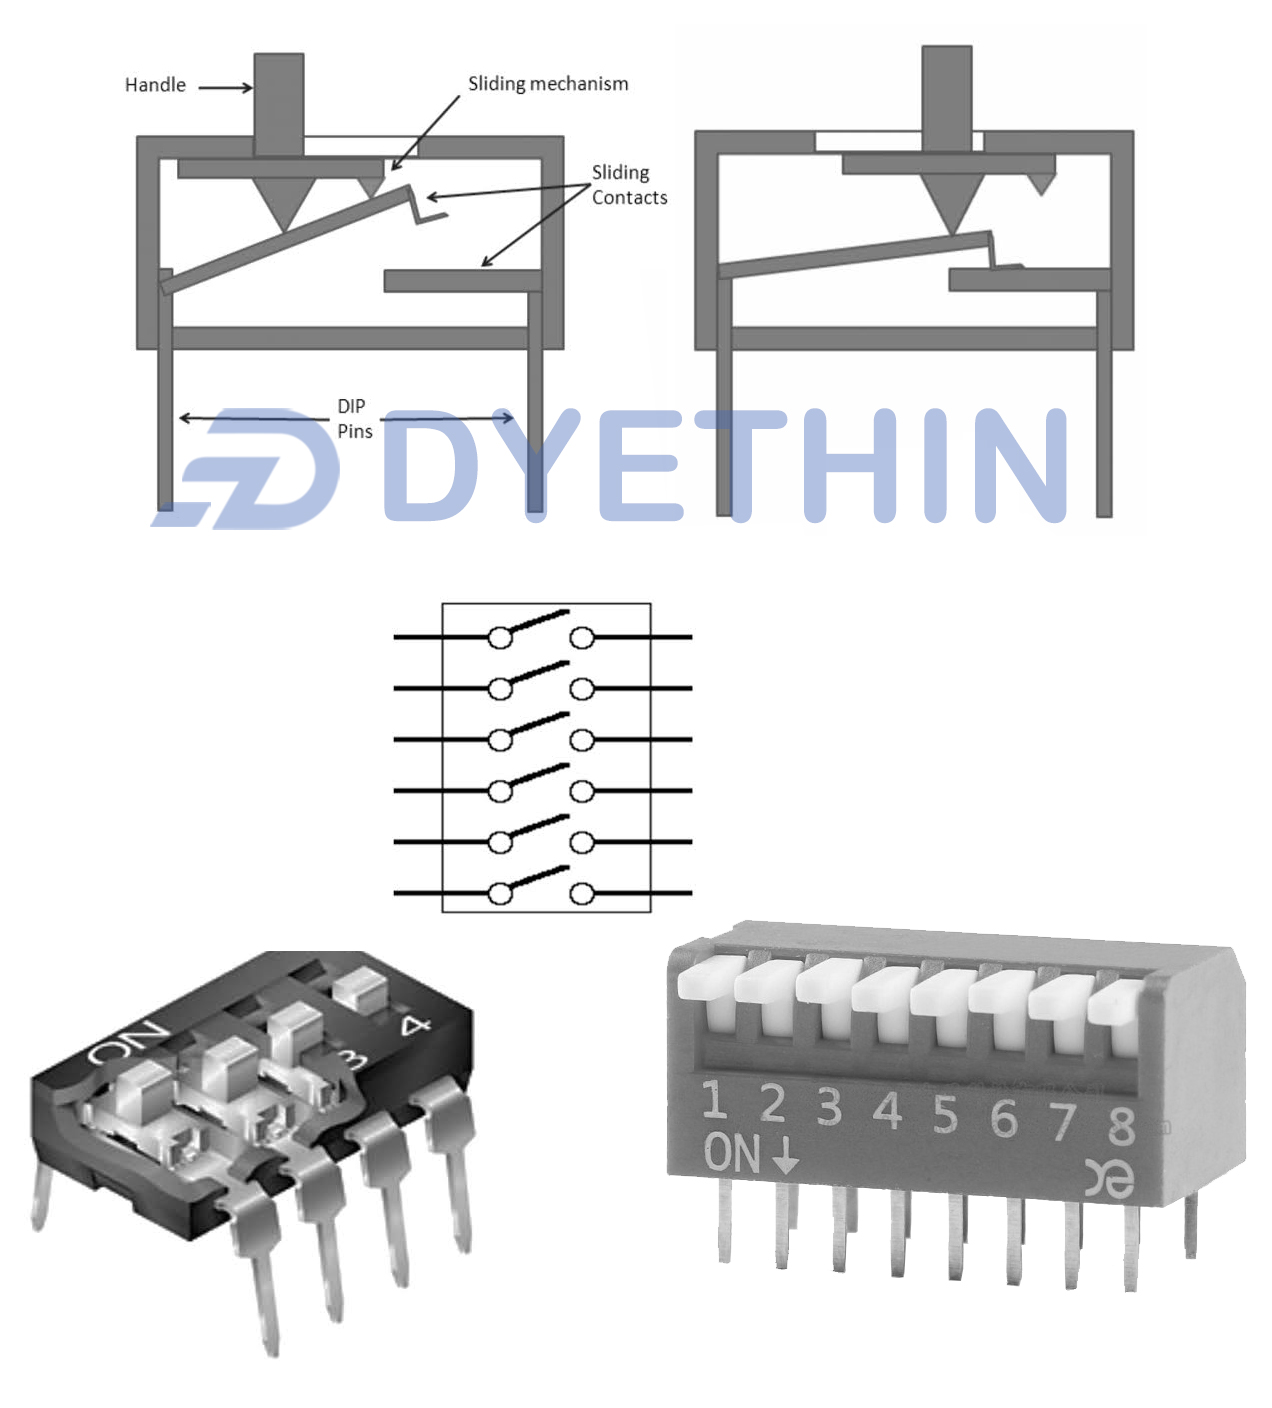
The Kali LP-6 board has a 12‑position dip switch block. Each switch controls a specific function, from power supply selection to voltage reference. Understanding the layout is key before you flip any switches.
Switch 1–4: Power Configuration
These switches select the primary power source. Setting them correctly ensures stable operation under different load conditions.
Switch 5–7: Output Drive Levels
These switches dictate the drive strength for the output pins. Adjusting them can improve signal integrity on long cables.
Switch 8–12: Debug and Safety Features
These are optional safety overrides. Misconfigured, they can cause the board to shut down or enter a protective state.
Optimal Dip Switch Settings for Everyday Use
If you’re running the Kali LP-6 in a typical lab setting, these are the default positions that balance performance and safety.
Power Mode (Switches 1–4)
- Switch 1: ON
- Switch 2: OFF
- Switch 3: ON
- Switch 4: OFF
This configuration selects the external 12V supply while enabling internal regulation.
Drive Strength (Switches 5–7)
- Switch 5: High
- Switch 6: Medium
- Switch 7: Low
High drive on the first pin ensures clear signal transmission, medium on the second balances current draw, and low on the third protects sensitive peripherals.
Safety Overrides (Switches 8–12)
- All set to OFF except Switch 9 set to ON for over‑voltage protection.
This minimizes unnecessary shutdowns while keeping critical safeguards active.
Advanced Configurations for High‑Performance Applications
When you push the Kali LP-6 to its limits—high data rates, long cable runs, or extreme temperature—you’ll need a tuned dip switch setup.
High‑Speed Mode (Switches 1–4)
- Switch 1: OFF
- Switch 2: ON
- Switch 3: OFF
- Switch 4: ON
Enabling the internal regulator provides cleaner voltage for fast signals.
Enhanced Drive (Switches 5–7)
- All set to High
Maximize signal integrity for high‑speed serial interfaces.
Debugging and Logging (Switches 8–12)
- Switch 10: ON to enable internal diagnostic LEDs.
- Switch 11: ON to enable serial debug output.
- All others OFF.
These settings help you monitor real‑time performance during stress tests.
Common Mistakes & How to Avoid Them
Even experienced users sometimes misconfigure the dip switches. Here’s a quick cheat sheet to prevent headaches.
Wrong Power Source
Setting Switch 2 ON while using an external supply can cause voltage spikes. Double‑check your power source before flipping.
Over‑Driving Outputs
Using High drive on all pins in a low‑current application can lead to overheating. Match drive strength to your peripheral’s tolerances.
Safety Feature Disabled
Turning OFF Switch 9 removes over‑voltage protection. Keep it ON unless you have an external protection circuit.
Comparison Table: Dip Switch Settings vs. Performance Metrics
| Setting Group | Switch Positions | Typical Current Draw (mA) | Signal Integrity |
|---|---|---|---|
| Default Everyday | 1-ON, 2-OFF, 3-ON, 4-OFF; 5-High, 6-Medium, 7-Low; 9-ON | 120 | Good |
| High‑Speed | 1-OFF, 2-ON, 3-OFF, 4-ON; 5-High, 6-High, 7-High; 9-ON, 10-ON, 11-ON | 180 | Excellent |
| Low‑Power | 1-ON, 2-OFF, 3-ON, 4-OFF; 5-Low, 6-Low, 7-Low; 9-ON | 70 | Adequate |
Expert Pro Tips for Mastering Kali LP-6 Dip Switches
- Label Your Board: Mark each switch with a sticky note to avoid mix‑ups during firmware updates.
- Document Configurations: Keep a change log in your project folder with serial numbers and dates.
- Use a Multimeter: Verify voltage levels after adjusting switches to catch errors early.
- Test in Isolation: Change one switch at a time and monitor the output.
- Backup Power: Keep a UPS ready during adjustments to prevent data loss.
Frequently Asked Questions about kali lp-6 best dip switch settings
What is the default dip switch configuration for Kali LP-6?
The factory default sets Switches 1‑4 to 1‑ON, 2‑OFF, 3‑ON, 4‑OFF; 5‑High, 6‑Medium, 7‑Low; and safety Switch 9 ON.
Can I use the Kali LP-6 without any dip switches turned on?
Yes, but the board will run on minimal power and may lack critical protection features. It’s not recommended for production use.
How often should I check my dip switch settings?
Re‑verify settings whenever you change firmware, replace power supplies, or notice performance issues.
What happens if I set all switches to HIGH?
Over‑driving can cause overheating, increased noise, and potential damage to connected peripherals.
Are there any software utilities to read dip switch states?
Some vendors provide diagnostic tools that read dip switch status via serial commands.
Can I programmatically change dip switch settings?
No. Dip switches are hardware toggles; you must change them physically.
How do I reset the Kali LP-6 to factory defaults?
Manually set the switches to the factory position listed above, then power cycle the board.
What safety precautions should I take when adjusting dip switches?
Ensure the board is powered off, use anti‑static wrist straps, and avoid touching exposed pins.
Is there a risk of permanently damaging the board by flipping switches?
Only if you set unsafe combinations like over‑drive on high‑current pins with inadequate cooling.
Can I use the Kali LP-6 in a high‑temperature environment?
Yes, but select the appropriate power and drive settings to avoid overheating and use additional heat sinks if needed.
By mastering the kali lp-6 best dip switch settings, you gain full control over your device’s behavior, ensuring reliability and peak performance in every application. Experiment responsibly, document every change, and keep these settings handy as your reference guide.
Ready to fine‑tune your Kali LP-6? Grab a multimeter, flip those switches, and watch your projects glide into a new era of precision.

