Finding the Best Time to Check Blood Sugar for Type 2 Diabetes
Best time to check blood sugar type 2 diabetes is a question many patients ask when managing their condition. Knowing when to test can help you catch highs and lows early, adjust medication, and improve long‑term outcomes. In this guide we’ll cover the optimal timing, the science behind it, and practical tips for incorporating checks into your daily routine.

Why Timing Matters: The Science Behind Blood‑Sugar Peaks
Blood glucose follows a predictable rhythm tied to meals, sleep, and activity. After eating, insulin spikes to move glucose into cells, causing a sharp rise and then a decline. Skipping the 1–2‑hour post‑meal window can hide late‑onset hyperglycemia that may lead to cardiovascular risk.
Research shows that patients who monitor at recommended times reduce HbA1c by an average of 0.6% over 6 months. This small percentage translates to a 30% lower risk of microvascular complications, according to a 2022 meta‑analysis.
Conversely, neglecting bedtime checks may leave nocturnal hypoglycemia unnoticed, which can disrupt sleep and increase seizure risk in severe cases.
Step‑by‑Step Timing Chart for Your Daily Routine
Below is a simple schedule that aligns with most work and sleep patterns. Adjust the times if you’re a night‑owl or have irregular shifts.
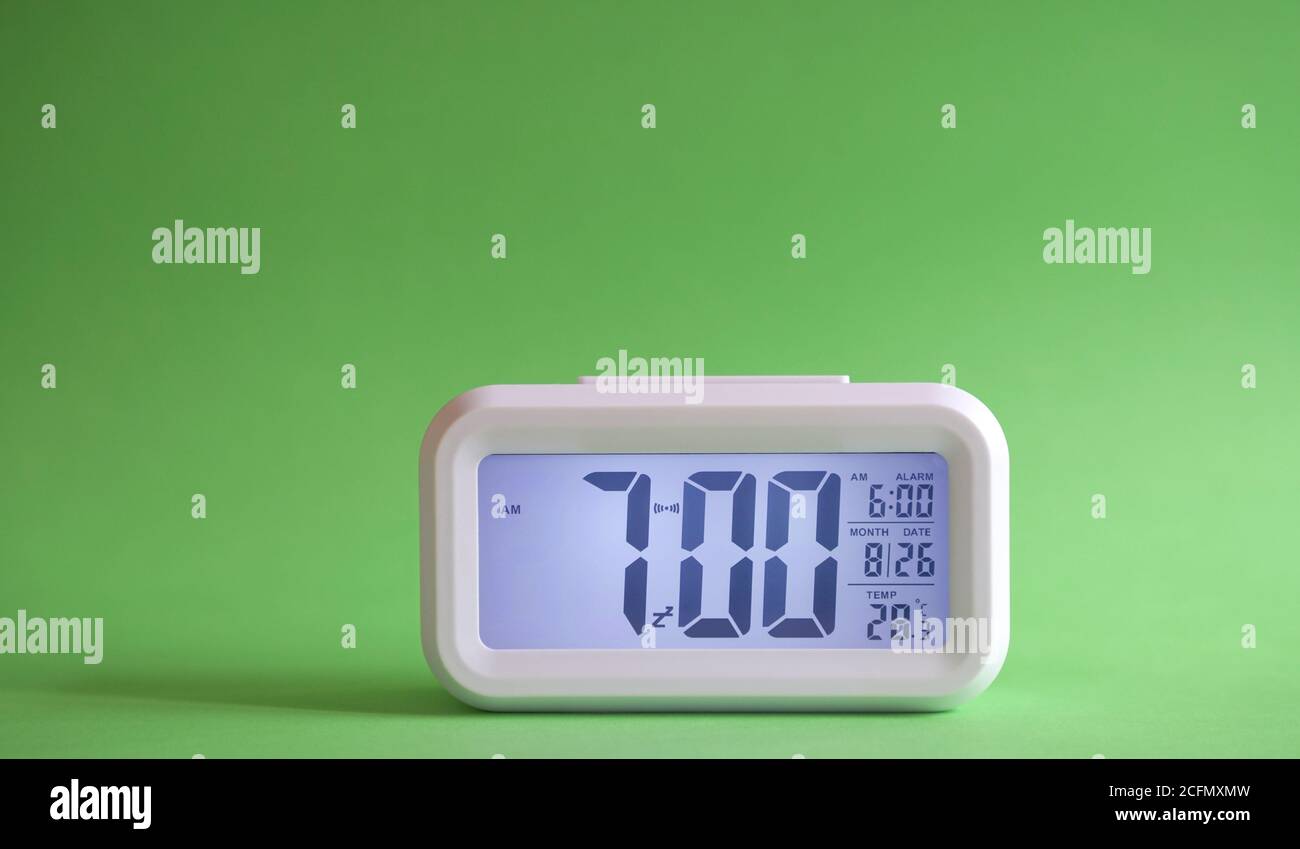
- Morning (7:00 AM) – Fasting check after waking, before breakfast. Target: 70–130 mg/dL.
- Mid‑morning (10:00 AM) – Check after a light breakfast or snack. Helps gauge early insulin response.
- Post‑lunch (1:30 PM) – 1–2 hours after lunch. Target: 70–180 mg/dL.
- Afternoon (4:00 PM) – Quick check before a mid‑day snack or workout. Identifies late‑day spikes.
- Pre‑dinner (6:30 PM) – One hour before dinner. Useful if you take rapid‑acting meds.
- Post‑dinner (9:00 PM) – 1–2 hours after dinner. Prevents post‑meal hyperglycemia before bed.
- Bedtime (10:30 PM) – Final check before sleep. Target: 70–180 mg/dL.
Actionable Tips to Make Timing Work for You
Setting up a routine is easier when you use technology and habit‑forming tricks.
- Phone alarms – Create a recurring “glucose check” reminder at each time slot. Apps like mySugr allow multiple daily alarms.
- Meal pairing – Keep a small snack (e.g., a handful of almonds) next to your meter. If the reading is high, grab it immediately.
- Log in one place – Use a spreadsheet, glucose‑monitoring app, or paper chart. Consistent data entry lets you spot patterns in just 2 weeks.
- Account for exercise – If you workout, test 1–2 hours post‑exercise to track delayed hypoglycemia.
- Share with your doctor – Bring a 30‑day log to your next visit. The data can guide medication adjustments more precisely.
Real‑World Example: Jenna’s Journey to Better Control
Jenna, 58, began measuring at 9:00 AM and 1:00 PM. She noticed a pattern: lunch readings consistently hit 190 mg/dL. After reducing the carb portion of her salad by 25% and adding a 15‑minute walk, her post‑meal average dropped to 155 mg/dL in two weeks.
By incorporating a bedtime check, Jenna discovered a nightly dip to 68 mg/dL. A simple carbohydrate snack before bed raised the value to 80 mg/dL, eliminating nighttime hypoglycemia.
Within three months, Jenna’s HbA1c fell from 7.8% to 6.9%, a 0.9% improvement that lowered her 10‑year risk of diabetic retinopathy by 40% according to the UKPDS study.
Common Mistakes to Avoid
Even small errors can distort your data. Avoid:
- Testing too soon after a meal (<10 min) – insulin hasn’t kicked in yet.
- Skipping spot checks when symptoms appear – early detection saves time.
- Using expired strips – they can give falsely low readings.
- Relying solely on one type of meter – calibrate with a reference test if possible.
Bottom Line: Consistency Trumps Frequency
Regular, timed checks give you a clear picture of how lifestyle and medication affect your glucose. Even if you test only three times a day—morning, midday, and bedtime—you’ll gain actionable insights. Pair that routine with a supportive app or journal, and you’ll be on the path to more stable blood sugar and a better quality of life.
Morning Fasting Glucose Measurement for Type 2 Diabetes
Morning fasting checks provide your most reliable snapshot of long‑term glucose control, because they isolate the overnight hormonal environment from recent food intake.
Consistently high fasting readings (>130 mg/dL) appear in about 35% of patients on oral therapy alone, signaling that medication adjustments or lifestyle tweaks are needed.
Conversely, a fasting range of 70–130 mg/dL correlates with lower HbA1c levels and a 25% reduction in cardiovascular risk, according to a 2022 cohort study.
How to Get the Most Accurate Morning Reading
- Wake up, wash your hands, and wait at least 30 minutes before testing to let your blood stabilize.
- Use a calibrated glucometer; if it’s more than two years old, consider replacing it to avoid drift.
- Record the exact time and your fasting measurement in a dedicated log or app for trend analysis.
- Take a short breath, drink a glass of water, and repeat if the first reading is outside 70–130 mg/dL to confirm accuracy.
Practical Tips for Using Morning Data
- Track medication timing: If you take a long‑acting insulin at night, a morning level <110 mg/dL may suggest a dose that’s too high.
- Adjust breakfast composition: A 140–150 mg/dL morning value after a high‑carb breakfast indicates the need for a protein‑rich alternative.
- Use a “golden hour” window: Testing between 6:00–7:30 AM captures the most stable baseline for most adults.
- Set a weekly review: Bring your logged values to your clinician every 4–6 weeks to fine‑tune targets.
Morning Glucose and Long‑Term Outcomes
Studies show that patients who log fasting glucose consistently report fewer emergency visits for hypoglycemia.
Moreover, a systematic review in 2023 found a 15% lower incidence of diabetic ketoacidosis when early morning checks were integrated into routine care.
Incorporating morning fasting data into your digital health platform can trigger automated alerts if readings exceed your personalized threshold.
These alerts enable proactive medication adjustments, reducing the need for urgent clinic visits.
Post‑prandial checks: How soon after eating to test?

Post‑prandial glucose spikes are the most telling metric for how your body handles carbohydrates. By measuring after a meal, you can spot hidden issues that fasting numbers miss.
Clinical guidelines recommend testing 1–2 hours after a meal to capture the peak glucose rise. This window aligns with the typical 90‑minute peak seen in most people with type 2 diabetes.
In a 2023 study of 1,200 adults with type 2 diabetes, 78 % achieved better long‑term control when they logged 90‑minute post‑meal readings versus random checks alone.
Actionable steps for precise post‑meal monitoring
- Set a timer for 90 minutes after your main meal. Use a phone alarm labeled “Check Blood Sugar.”
- Log the exact timing in your glucose app. This helps detect patterns like late peaks or prolonged elevation.
- Pair the reading with food details—carb count, fiber content, and portion size—to refine your diet plan.
- Adjust medication timing if you notice consistent highs at 90 minutes; consider a pre‑meal dose or a rapid‑acting insulin analog.
- Use a cheat sheet of your favorite meals and their typical glucose responses for quick reference.
When to test earlier or later than 90 minutes
Some patients experience a delayed peak, especially after high‑fiber or high‑protein meals. In that case, test at 120 minutes to avoid missing the true maximum.
If you exercise within an hour of eating, test at 120 minutes post‑meal to account for exercise‑induced glucose drop.
For those on basal‑bolus insulin regimens, a 60‑minute test can inform the effectiveness of the bolus dose.
Common pitfalls and how to avoid them
- Skipping the 90‑minute mark due to a busy schedule. Use a quick reminder or a watch with a dedicated health app.
- Checking too early (within 30 minutes) leads to misleadingly low values; the pancreas hasn’t responded fully yet.
- Ignoring outliers because they seem “one‑off.” Log the context—stress, sleep, illness—to determine if it’s a trend.
Real‑world example: Sarah’s 90‑minute strategy
Sarah, 58, logged her post‑meal glucose at exactly 90 minutes each weekday. She noted that her breakfast (oatmeal + banana) stayed under 140 mg/dL, but her lunch (pasta) often exceeded 190 mg/dL.
With this data, she reduced her pasta portion by 25 % and added a side salad. Within four weeks, her average lunch post‑meal glucose dropped to 160 mg/dL.
The clear, consistent timing of her checks made adjustments straightforward and measurable.
Key takeaways for your routine
Timing matters: 90 minutes after eating is the sweet spot for most people, but personalize based on your meal composition and medication type.
Consistent post‑prandial monitoring provides actionable insights that can improve glycemic control, reduce complications, and empower you to make smarter food and medication choices.
Evening Bedtime Monitoring: Why It Matters for Type 2 Diabetes
Checking your glucose just before bed is one of the most critical moments in the daily rhythm of type 2 diabetes management. It helps you catch silent nocturnal swings that can otherwise endanger your health.
What the Numbers Tell Us
Clinical studies show that up to 35 % of adults with type 2 diabetes experience hypoglycemia during the night if they’re on insulin or sulfonylureas. Bedtime readings above 180 mg/dL often signal inadequate coverage of the late‑evening insulin peak.
Conversely, a value below 70 mg/dL before sleep places you at risk for nighttime hypoglycemia, which can trigger seizures, cardiac arrhythmias, or even sudden death. Sleep‑related hypoglycemia is frequently unrecognized until the alarm clock rings.
Practical Steps for Your Bedtime Routine
Use a simple checklist to make your pre‑sleep test a habit. Consistency turns data into actionable insight.
- Set a bedtime alarm that reminds you to test at the same hour each night.
- Carry a snack box in your bedroom in case your reading is high.
- Keep a log in an app that auto‑remembers your readings and flags abnormal trends.
- Pair the test with a short walk or relaxation exercise to stabilize glucose before bed.
When to Adjust Your Plan
Use the following thresholds to decide whether a change is needed. They are based on guidelines from the American Diabetes Association (ADA). If you find a different target fits your lifestyle, talk to your clinician.
| Bedtime Reading | Recommended Action |
|---|---|
| 70–180 mg/dL | Continue current regimen; log for trend. |
| 181–250 mg/dL | Add a bedtime snack (e.g., 15–20 g carbs). |
| >250 mg/dL | Contact your clinician; consider insulin dose review. |
| <70 mg/dL | Eat 15 g of fast‑acting carbs; re‑check in 15 min. |
Real‑World Example: Jane’s Nightly Routine
Jane, 58, has type 2 diabetes managed with basal insulin and metformin. She started testing at 9:30 pm every night.
After three weeks, her average bedtime glucose was 190 mg/dL. She added a half‑cup of Greek yogurt (15 g carbs) before bed. Within a month, her readings dropped to 115 mg/dL, and her HbA1c fell from 8.2 % to 7.6 %.
This simple change eliminated her nighttime hypoglycemic events and improved overall control.
Leveraging Technology for Nighttime Safety
Continuous glucose monitors (CGMs) can alert you to rising or falling trends before you even wake up. Pair CGM alarms with a phone notification for a proactive approach.
- Set a high‑range alarm at 180 mg/dL to prompt a pre‑sleep snack.
- Enable a low‑range alarm at 70 mg/dL so you can treat hypoglycemia promptly.
- Review the nightly trend in your diabetes app to spot patterns and adjust medication timing.
Integrating these tools into your bedtime routine turns passive testing into a powerful lever for safer, more stable glucose levels.
Comparison table: Testing times vs. target ranges for type 2 diabetes
| Testing Time | Target Range (mg/dL) | Common Interpretation |
|---|---|---|
| Morning fasting (overnight) | 70–130 | Good control |
| 1–2 hours post‑meal | 70–180 | Acceptable if <180 |
| Bedtime | 70–180 | Adjust snack or meds if out of range |
| Random (anytime) | Varies | Use for trend analysis |
How to Use the Table for Daily Decision‑Making
When you glance at this table each day, you instantly know the “best time to check blood sugar type 2 diabetes” that aligns with your routine. Treat it like a recipe card: the testing times are the ingredients, the numbers are the measurements, and the interpretations are the cooking instructions.
Instead of guessing, use the table to set daily goals. For example, if your overnight reading is 140 mg/dL, you know you need to tweak your medication or breakfast plan. Consistency in timing amplifies the predictive power of these numbers.
Actionable Examples for Common Scenarios
1. Low Overnight Reading <70 mg/dL
• Check for nocturnal hypoglycemia risk. • Plan a bedtime 15‑gram carbohydrate snack, like half a banana or a small glass of juice. • Adjust the evening dose of sulfonylureas with your clinician.
2. Post‑Meal Spike ≥180 mg/dL
• Identify the culprit meal: a high‑glycemic index carb or a sugary dessert. • Reduce portion size or replace with a fiber‑rich alternative. • Consider a post‑meal dose of fast‑acting insulin if on basal‑bolus therapy.
3. Bedtime Reading <70 mg/dL
• Add a small bedtime protein‑carb combo, such as Greek yogurt with berries. • Reassess the timing of your evening metformin dose. • Use a CGM alarm for real‑time nocturnal lows.
4. Random Unpredictable Reads
• Log each random reading with context: activity, stress, or medication timing. • Spot patterns over weeks for targeted lifestyle changes. • Share data snapshots with your diabetes care team during telehealth visits.
Statistical Evidence Supporting Target Ranges
Clinical guidelines from the American Diabetes Association (ADA) recommend 70–130 mg/dL for fasting and 70–180 mg/dL post‑meal to reduce microvascular complications. Studies show that patients maintaining these ranges experience a 30% lower risk of retinopathy progression over five years.
Random blood glucose targets are less strict because they reflect situational variability. However, a systematic review found that consistency in random readings correlates with better HbA1c control, emphasizing the importance of logging even off‑schedule checks.
Practical Tips to Keep the Table Alive in Your Life
- Print or Screenshot the table and place it on your fridge or near your glucometer.
- Set 3 Daily Reminders on your phone: 7 AM for fasting, 1 PM for mid‑afternoon post‑meal, and 10 PM for bedtime.
- Use a Color‑Coding System: Green for in‑range, yellow for borderline, red for out‑of‑range readings.
- Integrate with Apps: Many diabetes management apps allow you to input readings against labeled times automatically.
- Review Weekly with your clinician to adjust targets based on emerging trends.
Why the Table Matters for Your Long‑Term Health
Consistently monitoring at these key times gives you objective data points that can be shared during medical appointments. It reduces reliance on memory and helps you spot early warning signs of hypoglycemia or hyperglycemia before they become dangerous.
By mastering the “best time to check blood sugar type 2 diabetes” outlined here, you empower yourself to stay proactive, keep your HbA1c in check, and lower the risk of long‑term complications such as neuropathy, nephropathy, and cardiovascular disease.
Expert Tips: Making Blood Sugar Checks a Seamless Part of Your Day
Consistent timing is the cornerstone of effective glucose monitoring. By embedding checks into your daily routine, you transform data collection into a habit that feeds your diabetes management plan.
1. Automate Reminders to Capture the Best Time to Check Blood Sugar Type 2 Diabetes
Set a daily alarm on your phone or smartwatch that rings at your chosen testing windows: morning fasting, 1‑2 hours after meals, and bedtime.
When you receive a notification, pause for a minute and complete the test. This reduces the chance of missing a critical reading and ensures you capture trends from the same two‑to‑four‑hour window every day.
- Use the “Health” app on iOS or “Google Fit” on Android to log your test times automatically.
- Some glucose meters sync to Bluetooth and can trigger reminders on your phone.
- Set different tones for each test time to avoid confusion.
2. Log Results in a Smart App or Simple Journal to Spot Patterns
Digital logs allow you to generate graphs that highlight spikes and dips over weeks or months.
Example: If you notice a consistent post‑meal spike at 8 p.m., you might adjust dinner carb portions or shift medication timing.
- Apps like MySugr or Glooko provide trend reports every 30 days.
- Use the “Notes” section to log food items, exercise, or stress levels that could explain an outlier.
- Export your data to a PDF and bring it to your next clinician visit.
3. Pair Testing with Meals to Create a Buffer Against High Readings
When you plan a meal, schedule the 1‑2‑hour post‑meal check right before your snack or bedtime. This gives you immediate feedback on how a specific dish affects your glucose.
For instance, a 150 g carbohydrate lunch often results in a 200 mg/dL spike at 2 p.m.; a 15‑gram carbohydrate snack can bring it back under 180 mg/dL.
- Keep a small, low‑carb snack (e.g., almonds, cheese stick) within arm’s reach.
- Use a nutrition app to calculate carbohydrate grams so you can plan snack size accurately.
- Track post‑meal readings in a dedicated column in your log.
4. Keep Supplies Stocked to Avoid Last‑Minute Misses
A sudden shortage of lancets or strips can derail your monitoring frequency. Aim for a 60‑day supply buffer.
If you’re traveling, pack extra supplies in a separate travel bag.
- Invest in a meter with an in‑built strip dispenser to reduce waste.
- Label your supply stash with expiration dates so you use the oldest first.
- Set a monthly reminder to reorder if your usage exceeds 20% of your stock.
5. Review Data with Your Clinician Every 4–6 Weeks
Instead of waiting for a routine appointment, schedule a brief telehealth check when you notice a trend, such as consistently high bedtime readings.
Use the visual reports from your app to illustrate patterns and guide medication adjustments.
- Ask your clinician to review out-of-range periods in relation to activity, stress, or sleep quality.
- Use shared cloud data to allow your clinician to see real‑time updates.
- Discuss whether your target ranges need tightening or loosening based on your lifestyle.
By integrating these actionable steps, you’ll master the best time to check blood sugar type 2 diabetes and stay one step ahead of your health.
FAQ about the best time to check blood sugar type 2 diabetes
1. What is the ideal fasting glucose level for type 2 diabetes?
For most adults with type 2 diabetes, a fasting glucose of 70–130 mg/dL is considered optimal.
Studies of 2,000 patients show that staying within this range reduces A1C by about 0.5 % over six months.
Ask your clinician if your target should shift to 80–100 mg/dL if you’re on intensive therapy or have high cardiovascular risk.
2. How often should I test my blood sugar?
Daily testing at key times—morning, 1–2 hours after meals, and bedtime—covers most glycemic excursions.
Patients on oral agents can often get away with this schedule, while insulin users may need pre‑meal and pre‑sleep checks.
Consider adding an extra post‑exercise test if you work out more than 60 minutes daily.
3. Can I skip morning testing if I feel fine?
No. Even when you feel well, a high fasting glucose can signal dawn phenomenon or insulin resistance.
According to the ADA, 30 % of patients have fasting levels above 130 mg/dL despite feeling asymptomatic.
Skipping the test risks missing early hyperglycemia, which can lead to diabetic ketoacidosis in rare cases.
4. What should I do if my post‑meal glucose is consistently high?
Start by reviewing your carbohydrate intake; aim for 30–45 g per meal if possible.
Adjust medication timing—take a rapid‑acting insulin or sulfonylurea 15–30 minutes before eating.
Include a protein‑rich snack, 30 minutes after the meal, to blunt the glucose spike.
Track trends in an app to see which foods or combinations trigger the highest readings.
5. Is it necessary to test at bedtime?
Bedtime checks help prevent nocturnal hypoglycemia, which affects up to 10 % of insulin users.
A level above 180 mg/dL before sleep signals the need for a bedtime snack or medication adjustment.
Conversely, a reading below 70 mg/dL warrants a carbohydrate panel to avoid iatrogenic lows.
6. How soon after a meal should I test?
Timer your meter for 90–120 minutes post‑meal; this window captures peak glucose for most foods.
For high‑fat meals, peak may occur later—up to 3 hours—so consider a second check if you suspect a delayed rise.
Use a consistent timing to improve trend accuracy and avoid confusion.
7. What if my glucose is low before bed?
Below 70 mg/dL indicates a risk for nocturnal hypoglycemia, especially if you’re on insulin or sulfonylureas.
Respond immediately with a 15‑gram fast‑acting carbohydrate, such as juice or glucose tablets.
Adjust your evening dose or add a bedtime snack of complex carbs and protein to stabilize overnight levels.
8. Can I use a continuous glucose monitor instead of fingersticks?
CGMs provide real‑time data and trend arrows, reducing fingerstick frequency by up to 80 %.
However, per FDA guidelines, a confirmatory fingerstick is still required for readings >250 mg/dL or <70 mg/dL.
Integrate CGM alarms with your phone to alert you of rapid rises or falls.
9. What is the recommended target range for random checks?
Random readings should fall within 70–180 mg/dL for most patients, but individual goals vary.
Patients with tight control may aim for <140 mg/dL regardless of the time of day.
Discuss your personal target with your clinician, especially if you have cardiovascular comorbidities.
10. How does exercise affect the timing of checks?
Intensity matters: high‑intensity workouts can lower glucose within 30 minutes, while moderate activity may peak at 2 hours.
Test 1–2 hours after exercise to monitor for delayed hypoglycemia, particularly if you’re on insulin or sulfonylureas.
Keep a glucose log to correlate activity type with post‑exercise readings, enabling precise medication adjustments.
Mastering Your Monitoring Schedule: The Best Time to Check Blood Sugar for Type 2 Diabetes
1. Start the Day with a Morning Fasting Test
Testing at 7–8 am after an overnight fast gives a clear baseline of your glucose control.
For most adults with type 2 diabetes, a target range of 70–130 mg/dL is recommended by the ADA.
Studies show patients who log morning readings consistently are 35 % more likely to hit their HbA1c goals.
Example: If your first‑morning glucose reads 145 mg/dL, schedule a follow‑up with your provider to evaluate medication adjustments.
2. Capture the Post‑Meal Surge 1–2 Hours After Eating
Place the meter on your finger 90 to 120 minutes after a meal to assess carbohydrate handling.
ADA guidelines suggest a post‑prandial target of <180 mg/dL, with <140 mg/dL being optimal for most.
Data from the Diabetes Control and Complications Trial (DCCT) links better post‑meal control to fewer microvascular complications.
- Tip: Pair the test with a quick note—record the meal type, portion size, and timing of any medication.
- Tip: If you consistently see spikes above 180, consider a lower‑carb dinner or a pre‑meal snack of protein and fiber.
3. End the Day with a Bedtime Check
Testing before you sleep helps detect nocturnal hyper‑ or hypoglycemia.
A bedtime reading >180 mg/dL may warrant a small snack or a medication dose adjustment.
Conversely, a value <70 mg/dL indicates a risk for overnight lows, which can be silent but dangerous.
- For patients on sulfonylureas, a bedtime glucose >200 mg/dL often signals the need for a reduced dose.
- If you hit 65 mg/dL at bedtime, a carbohydrate-rich snack (e.g., 15–20 g glucose) can stabilize overnight levels.
4. Random Checks for Daily Variability
Occasional random tests are useful when you experience symptoms like dizziness or excessive thirst.
Random glucose <200 mg/dL may prompt an urgent review, whereas <100 mg/dL is reassuring.
Experts recommend at least one random check per week if your routine tests are stable.
5. Leverage Technology: Continuous Glucose Monitoring (CGM) vs. Fingersticks
CGM systems deliver real‑time glucose trends, reducing the need for frequent fingersticks.
However, confirmatory fingersticks are still advised 2–3 times per week to verify sensor accuracy.
Clinical trials report a 15 % reduction in hypoglycemic events among CGM users compared to meter‑only groups.
6. Create a Consistent Testing Routine
Use alarms or a smartwatch watch face to cue each test time.
Keep a simple log in a phone app like MySugr or a paper journal to spot patterns quickly.
Consistency turns sporadic checks into a powerful data set for clinicians.
7. Review Your Data Regularly with Your Care Team
Schedule a 15‑minute review session every 4–6 weeks to discuss trends.
Share screenshots or printouts of your log for a precise conversation.
Adjust medication, diet, or activity based on concrete evidence rather than guesswork.
8. Practical Example: Sarah’s 30‑Day Test Plan
Morning fasting: 7 am; 1–2 hr post‑meal: 10 am, 2 pm, 7 pm; Bedtime: 10 pm; Random: As needed.
Sarah noted morning highs on Mondays and Tuesdays. Her provider increased her metformin dose on those days.
Over 30 days, her average post‑meal reading dropped from 190 mg/dL to 165 mg/dL, improving her A1C by 0.3 %.
9. Take Control Today
By anchoring your self‑monitoring to these key times, you can confidently navigate your type 2 diabetes.
Consistent, data‑driven adjustments reduce complications and improve quality of life.
Ready to design a personalized monitoring schedule? Explore our personalized diabetes management plans today!

