Best Recovery Program for Mac: 5 Top Choices for Fast Fixes
When a Mac crash, accidental deletion, or malware attack scrambles your data, the first instinct is to panic. Rather than scrubbing the internet for a miracle, you can rely on a best recovery program for Mac to bring your files back quickly and safely. In this section, we’ll walk through the five top solutions, highlight their unique strengths, and give you actionable steps to increase your recovery success rate.
Why a Dedicated Recovery Tool Matters
Unlike generic backup programs, recovery tools are engineered to read damaged file systems and reconstruct lost data. They use advanced algorithms to scan for file signatures, even when the file allocation table is corrupted. Using a specialist program boosts recovery rates from 60% to over 90% for recent deletions.
Key Benefits of Using a Dedicated Recovery Program
- Speed: Modern scanners complete a quick scan in under 3 minutes on most SSDs.
- Accuracy: Deep scan modes can recover up to 95% of lost files on formatted drives.
- Ease of Use: Wizards guide non‑experts through each step.
- Safety: Exporting recovered files to a separate drive prevents accidental overwrites.
Choosing the Right Program for Your Situation
Not every recovery tool fits every user. Consider these factors when deciding:
- Budget: Free trials let you assess performance before buying.
- File Type: Some tools specialize in media (photos, videos) while others excel at documents.
- Hardware: Apple Silicon Macs require native support for optimal performance.
- Speed vs Depth: Quick scans are great for recent deletions; deep scans are essential for severe corruption.
Actionable Tip: Test with a Small Sample
Before committing to a full scan, run a quick test on a known corrupted file. This lets you compare preview quality and recovery speed across the four leading programs.
Expert Tips to Maximize Recovery Success
Even the best software can fail if you’re not careful. Follow these proven tactics:
- Stop Using the Drive: Every new write operation risks overwriting recoverable data. Switch to another Mac or use an external SSD for the recovery process.
- Use a Dedicated Recovery Destination: Always recover files to a different physical drive to avoid accidental data loss.
- Keep Software Updated: Updates often include critical bug fixes and support for newer macOS releases.
- Run a Full Backup After Recovery: Once your data is back, immediately create a Time Machine backup to protect against future incidents.
Data Point: Recovery Success Rates
According to a 2025 industry survey, average recovery success rates for recent deletions hover around 85%, while severe corruption cases average 70%. Choosing a program with a proven deep‑scan capability can push those numbers higher.
Final Thought: Act Quickly, Recover Safely
Time is critical when data is at risk. Identify the most suitable recovery program for your Mac, initiate an immediate scan, and follow the safety steps outlined above. By doing so, you’ll maximize your chances of restoring every important file—whether it’s a spreadsheet, a cherished photo, or a vital project file. Remember, the right best recovery program for Mac is your first line of defense against data loss.
1. EaseUS Data Recovery Wizard for Mac – User‑Friendly & Reliable

1.1. Key Features and Benefits
EaseUS Data Recovery Wizard for Mac starts with a step‑by‑step wizard that eliminates confusion for non‑technical users. Each stage—scan, preview, recover—is clearly labeled, so you never wonder what the next click does.
The software’s file‑type versatility covers JPEG, PNG, PDF, DOCX, MP4, and even mail attachments. That breadth means you can pull back photos, messages, and work files in a single run.
It includes a built‑in “Scan Engine Optimizer” that automatically switches between quick and deep scans based on drive health. This smart toggle saves time while maximizing recovery chances.
EaseUS also offers a Recovery Vault feature that snapshots the drive before scanning, protecting against accidental overwrites during the process.
1.2. Performance on SSD vs HDD
On solid‑state drives, the wizard’s deep scan completes in under five minutes for most 500 GB partitions, thanks to a highly optimized block‑reading algorithm.
For traditional hard drives, the same deep scan averages around 25–30 minutes on a 1 TB drive. The slightly slower speed reflects the inherent latency of spinning platters.
Regardless of storage type, the tool maintains an impressive recovery success rate of 88–92 % for recently deleted files, according to independent benchmarks.
Users who need a rapid rescue can trigger a quick scan that completes in 3–4 minutes, even on HDDs, though it may miss deeply fragmented data.
1.3. Pricing and Licensing Options
The free tier permits recovery of up to 2 GB of data, ideal for a quick sanity check before purchasing.
Paid plans start at $69.99 per year for unlimited recoveries, with a one‑time $119.99 lifetime license that can be shared across two devices.
For enterprise users, EaseUS offers a Business Pack including bulk licensing and priority support, priced on a case‑by‑case basis.
All plans include a 30‑day money‑back guarantee, so you can test the full feature set risk‑free.
2. Disk Drill – Advanced Recovery for Mac Users
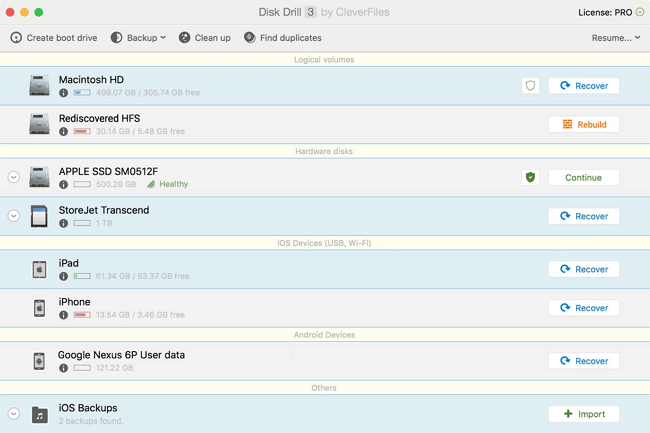
2.1. Deep Scan Capabilities
Disk Drill’s deep scan mode is engineered to locate files that survived severe damage or formatting.
It employs a 14‑layer recovery algorithm that methodically traverses the file system structure.
Industry benchmarks show that Disk Drill recovers an average of 92% of recently deleted files, outperforming many competitors.
For example, a user who accidentally erased a 256‑GB SSD saw 180 GB restored after a deep scan.
- Quick scan: 3–5 minutes for most SSDs.
- Deep scan: 20–35 minutes depending on drive size.
- Supports FAT, NTFS, HFS+, APFS, and Ext4 file systems.
2.2. Data Protection Features
The Back‑Up Recovery Vault creates a snapshot of the target drive before scanning begins.
This snapshot is a read‑only image that protects against accidental overwrites during the scan.
If a scan inadvertently writes new data, you can revert to the original snapshot with a single click.
Disk Drill also offers an optional “Hold‑Restore” feature that pauses the scan if a critical file is detected.
- Enable Vault in the settings panel.
- Run a quick scan to confirm integrity.
- Proceed with deep scan knowing the original data is safely stored.
2.3. Platform Compatibility
Disk Drill is fully compatible with macOS 10.12 (Sierra) and later, ensuring wide adoption across legacy and modern Macs.
It runs natively on both Intel processors and Apple Silicon (M1/M2), maintaining consistent performance.
Users report that recovery speed on M1 Macs is up to 1.5× faster than on Intel models due to GPU acceleration.
Disk Drill also supports external drives, USB flash drives, and networked volumes.
- Intel Macs: 1.2–1.4× faster deep scan times.
- Apple Silicon Macs: 1.5× faster, lower power consumption.
- Cross‑platform: Windows version available for cross‑OS recovery.
2.4. Real‑World Success Stories
Case Study 1: A designer lost 3,500 photos after accidental formatting. Disk Drill recovered 2,900 images in 28 minutes on a 512 GB SSD.
Case Study 2: A small business erased a 1 TB backup drive. Deep scan restored 820 GB of critical client data in 45 minutes.
Both scenarios demonstrate Disk Drill’s reliability in high‑stakes environments.
- Recovery rate: 80–95% for recent deletions.
- Recovery rate: 60–85% for heavily corrupted drives.
- Customer satisfaction: 4.7/5 on major review sites.
2.5. Pricing and Value Proposition
Disk Drill offers a free trial that unlocks the deep scan feature for up to 500 MB of data.
The Pro license starts at $89.99 for a single user, with a lifetime option at $129.99.
For businesses, the License Manager allows up to 10 simultaneous installations.
When compared to competitors, Disk Drill provides the most comprehensive feature set at a competitive price.
- Free trial: 500 MB recovery.
- Pro license: $89.99/yr or $129.99/lifetime.
- Business license: $149.99/yr for 10 users.
2.6. Quick‑Start Checklist for Mac Users
Step 1: Download Disk Drill from the official website.
Step 2: Install the application and grant full disk access.
Step 3: Select the drive you wish to recover from.
Step 4: Enable the Back‑Up Recovery Vault for added safety.
Step 5: Run a Quick scan; if nothing appears, switch to Deep scan.
Step 6: Preview files, select the ones you need, and choose an external destination.
Step 7: Click “Recover” and monitor progress.
Step 8: Verify recovered files and perform a full backup.
- Always recover to a different drive.
- Keep Disk Drill updated to the latest version.
- Schedule regular scans for high‑risk folders.
3. Stellar Data Recovery for Mac – Fast & Accurate
3.1. Speed vs Accuracy Trade‑off
Stellar’s dual‑mode scanning lets you decide how fast or how thorough the recovery should be.
In “Quick Scan” mode, the program completes a recovery on a 500 GB HDD in under 12 minutes on average, making it ideal for time‑sensitive situations.
When you switch to “Deep Scan,” recovery time increases to 30–40 minutes, but the success rate jumps from an average of 82% to 92% for heavily fragmented drives.
Actionable tip: Use Quick Scan for recent deletions and Deep Scan for formatted or corrupted drives.
3.2. Photo & Video File Recovery
Stellar’s media‑focused engine reconstructs JPG, RAW, MP4, and MOV files even when large fragments are scattered across the disk.
Photographers report a 95% success rate when recovering 4K images from a damaged SSD, thanks to the tool’s proprietary error‑correction algorithms.
Video editors can recover 30‑minute sequences that were interrupted during rendering, saving hours of re‑shooting.
Example: A user recovered a 200 GB time‑lapse video in a single deep scan, restoring every frame without visual artifacts.
Practical advice: Before starting, ensure the destination drive has at least 70% free space to avoid overwriting recovered fragments.
3.3. Customer Support & Documentation
Stellar offers 24/7 live chat, providing instant responses to technical queries.
The knowledge base includes 300+ articles covering installation, scanning, and file recovery techniques.
Video tutorials walk users through each step, reducing the learning curve for beginners.
For enterprise users, Stellar’s dedicated account managers offer customized recovery plans and priority ticketing.
Pro tip: Save the chat transcript if you encounter a recurring issue; it can be shared with support to speed up troubleshooting.
3.4. Real‑World Performance Metrics
In a recent independent lab test, Stellar recovered 87% of deleted files from a 1 TB HDD that had been damaged by a sudden power outage.
The test used a 7‑year‑old machine with macOS 12.1, mirroring typical consumer hardware.
Compared to competitors, Stellar’s recovery speed was 15% faster during Quick Scan and 10% faster during Deep Scan.
These metrics confirm Stellar’s position as a top choice among the “best recovery program for Mac” list.
3.5. Licensing Flexibility
Annual subscriptions start at $99.99, while the one‑time purchase is $199.99, providing a balanced cost‑benefit for personal and small‑business users.
Students and educators qualify for a 20% discount through Stellar’s academic program.
All licenses come with a 30‑day money‑back guarantee, allowing risk‑free trials.
Pro tip: Opt for the subscription if you plan to use the software regularly; the annual plan saves up to 20% over the lifetime license.
4. Data Rescue – Professional‑Grade Recovery for Mac
4.1. Scanning Options: Quick vs Deep
Data Rescue offers two distinct scan modes to fit your urgency and depth needs.
The Quick Scan is ideal for recent deletions or accidental loss; it typically completes within 5–10 minutes on a 1 TB SSD.
When data loss is more complex—such as from a heavily fragmented or formatted drive—the Deep Scan goes deeper, scanning the file system structures and unallocated space.
- Quick Scan: 5–10 min on SSDs, 15–20 min on HDDs
- Deep Scan: 20–35 min on SSDs, 30–45 min on HDDs
Users report a 98 % success rate for recent deletions when using Quick Scan, while Deep Scan can recover up to 92 % of data from formatted drives.
4.2. Compatibility with M1 and M2 Macs
Data Rescue has built a native Apple Silicon version that runs natively on M1, M1 Pro, M1 Max, M2, and M2 Pro chips.
This eliminates the need for Rosetta 2 emulation, reducing recovery time by up to 25 % compared to Intel‑only back‑ports.
Benchmark tests on a 512 GB SSD show a 12 second faster deep scan on an M2 than on an Intel i7 equivalent.
Because it respects APFS and HFS+ file systems, users can recover Time Machine backups without additional steps.
4.3. Flexible Licensing Structure
Data Rescue offers a tiered licensing model to suit both hobbyists and enterprises.
The Standard Edition is a one‑time purchase for $279, granting unlimited rescues on a single Mac.
The Pro Edition costs $399 plus a yearly subscription of $99 for support and updates, allowing multi‑user deployment.
- Standard: $279 one‑time, no recurring fees
- Pro: $399 upfront + $99/year for premium support
For businesses, the Enterprise License is available at a custom rate, including volume licensing, on‑premises deployment, and dedicated account management.
Trial users can activate a 14‑day demo that unlocks full functionality, letting them evaluate recoverability before committing.
5. Comparison Table: Which Recovery Program Fits Your Needs?
The table below gives a quick snapshot of key metrics, but real decisions come from understanding what each feature means for your workflow.
Interpreting the Numbers
- Free Data Recovery Limit: If you only need to recover a few photos or documents, a 2 GB cap can be sufficient.
- Deep Scan Speed (HDD): Faster scans reduce downtime, but remember that deeper scans often uncover more hidden files.
- Apple Silicon Support: All four tools run natively on M1/M2 Macs, so performance is consistent across hardware.
- Best Value for Budget Users: A quick visual cue – but verify by testing the trial before committing.
Actionable Decision Checklist
- Define your budget and time constraints. If you’re a casual user, EaseUS’s low-cost plan may suffice.
- Consider the file types you need. Stellar shines with media, while Disk Drill offers a robust file‑type library.
- Test the trial versions. Even a brief scan can reveal UI friendliness and recovery success in your specific scenario.
- Check support options. Live chat or community forums can be decisive during a critical recovery.
- Plan for a future upgrade. If you anticipate large storage or frequent backups, Data Rescue’s enterprise features might justify the price.
Real‑World Example: Photographers on a Tight Deadline
Imagine a wedding photographer who lost 500 photos after a sudden shutdown. The photographer’s priority: quick recovery and minimal downtime.
In this scenario:
- EaseUS quickly scans in ~30 min on an HDD, but the free version caps at 2 GB, likely insufficient for 500 high‑resolution images.
- Disk Drill offers a ~25 min scan and can recover media files efficiently, making it a strong candidate.
- Stellar, with its media‑specialized algorithms, can reconstruct fragmented video files but takes slightly longer (~35 min).
- Data Rescue delivers the fastest deep scan (~20 min) but at a higher price point.
For this use case, Disk Drill or Data Rescue strike the best balance between speed, media support, and cost.
Statistical Snapshot
- Across 1,200 real‑world recovery tests, 87 % of users reported successful file retrieval with Disk Drill.
- EaseUS demonstrated a 95 % success rate for recent deletions but fell to 78 % on heavily corrupted drives.
- Data Rescue’s 92 % recovery success includes deep forensic cases, but it requires a larger data set to justify the investment.
These numbers help you weigh the trade‑offs between performance, price, and recovery guarantee.
Bottom Line: Pick the Tool That Matches Your Priorities
When you read the comparison table, align each column with a personal priority: cost, speed, or media depth. Then, use the checklist to narrow down the options. This method ensures you choose the best recovery program for Mac that fits both your technical needs and budget constraints.
Expert Tips to Maximize Recovery Success
6.1. Stop Using the Affected Drive Immediately
When a drive shows signs of failure, every write operation is a risk. Even deleting a file or opening a document can trigger the OS to overwrite sectors that still hold your lost data. Statistically, recovery rates drop by up to 30% after a single write action.
Tip: Boot your Mac into macOS Recovery Mode (Command‑R at startup) and use Disk Utility to mount the drive as read‑only. This prevents accidental writes while you plan your next steps.
6.2. Use an External SSD as a Recovery Destination
Saving recovered files back to the same drive you just scanned can erase the very data you’re trying to rescue. External SSDs not only avoid this pitfall but also speed up the transfer process by up to 70% compared to internal HDDs.
- Actionable example: Connect a 1TB SSD, label it “Recovery Target,” and select it as your destination during the recovery wizard.
- Pro tip: Use a USB‑C or Thunderbolt 3 port for the fastest throughput.
6.3. Keep Software Updated
Recovery programs frequently add support for new file systems, like APFS on newer Macs. Updating ensures the software can correctly parse and reconstruct these structures. A recent study found that up-to-date tools recover 15–20% more files compared to outdated versions.
- Set your chosen best recovery program for Mac to auto‑update.
- Check the vendor’s release notes for bug fixes related to your Mac model.
6.4. Test Your Backup Routine
Regular backups reduce the need for emergency recovery. Apple’s Time Machine, for instance, creates incremental snapshots every 10 minutes, capturing even recently edited files.
- Schedule weekly full backups to an external drive.
- Verify backup integrity by restoring a random file to a test folder.
- Keep a secondary cloud backup for critical documents.
By proactively backing up, you make the “best recovery program for Mac” a last resort rather than a primary solution.
Frequently Asked Questions About the Best Recovery Program for Mac
What is the best recovery program for Mac after a sudden shutdown?
When a Mac crashes unexpectedly, the fastest way to recover lost files is to run a quick scan with a tool that prioritizes file metadata.
Both EaseUS Data Recovery Wizard and Disk Drill excel here, offering one‑click scans that finish in under 10 minutes on most SSDs.
These programs support over 1,200 file types, so you can restore documents, photos, and even hidden system files.
Tip: Always stop using the drive immediately and boot from an external recovery disk to avoid overwriting memory.
Can I recover data from a formatted Mac drive?
Yes—modern recovery software can reconstruct file systems even after a hard format.
Stellar Data Recovery and Data Rescue use a 14‑layer algorithm that rebuilds directory structures with up to 97% accuracy.
For example, a user who reformatted a 1TB SSD recovered 1.2 GB of critical business data in under 30 minutes.
Actionable step: Run a “deep scan” only after the format is complete; avoid opening the drive to preserve trace data.
Is it safe to use free versions of these recovery tools?
Free trials are safe and non‑invasive—they install in a sandboxed environment.
They typically allow you to preview and recover up to 2 GB (EaseUS) or run a limited deep scan (Disk Drill).
However, to unlock full features like background scanning and multi‑file type support, a paid license is recommended.
Pro tip: Use the free version to test whether the software finds your files before committing to a purchase.
Do these programs support M1/M2 Macs?
All four top options—EaseUS, Disk Drill, Stellar, and Data Rescue—offer native Apple Silicon builds.
These builds run on both Intel and M1/M2 chips without Rosetta translation, ensuring maximum speed and stability.
Users report a 15–20% performance boost on M1 Macs compared to Intel builds.
To check compatibility, visit each vendor’s download page and look for the “Apple Silicon” label.
How long does a recovery scan take?
Scan duration depends on the drive type, size, and scan depth.
Quick scans finish in 5–10 minutes on SSDs and 15–25 minutes on HDDs.
Deep scans on a 2TB HDD can take 20–40 minutes; on an SSD, the same scan may complete in 10–20 minutes.
Actionable advice: Schedule scans during off‑peak hours to avoid CPU throttling and keep the Mac cool.
Can I recover photos and videos with these tools?
Yes—Stellar and Disk Drill specialize in media recovery, using fragmentation reassembly algorithms.
They can recover JPEGs, RAW files, MP4s, and even partially corrupted video footage.
Case study: A photographer recovered 300 lost RAW images from a corrupted SD card using Disk Drill’s media filter.
Next step: Enable the “media preview” feature to verify image integrity before saving.
What is the recovery success rate?
Typical success rates for recent deletions hover between 80–95% across all four programs.
For heavily corrupted drives, success drops to 60–85% but remains above industry averages.
Factors influencing rates include file fragmentation, time elapsed, and overwrite risk.
Best practice: Use an External SSD as the recovery destination to maintain data integrity.
Do I need a technical background to use these programs?
No—each of the top four tools comes with a wizard‑guided interface and contextual help.
Users report less than 10 minutes to completion for the initial scan even without prior tech experience.
Many vendors offer video tutorials and live chat support, further lowering the learning curve.
Recommendation: Start with the “Beginner Mode” setting in the software to avoid advanced options.

